Search for:
Woman removing shelves to clean a fridge interior with bicarbonate of soda.

How to clean a fridge with bicarbonate of soda?

Baking soda’s cleaning prowess lies in its slight abrasiveness and natural deodorizing properties, which make it an ideal choice for a deeper clean that will not harm your fridge’s interior surfaces. It can neutralize acidic compounds and absorb unwelcome smells, ensuring that when you slide your food back onto the shelves, it rests in a sanitized environment. Additionally, bicarbonate of soda is safe and eco-friendly, so you can clean without worrying about toxic residues that might be harmful to you and your family.

Another reason why baking soda is so popular is that it could also be used to clean other parts of your home. Its versatility extends from the kitchen to the bathroom, and since it does not produce strong fumes or leave behind dangerous chemicals, it’s a staple in many households’ green cleaning arsenals.

Bicarbonate of soda sprinkled on a cloth for eco-friendly fridge cleaning.

Preparing to Clean Your Fridge

Cleaning your fridge might not be on your list of fun activities, but it’s a necessary chore. A good time to clean is right before you do your grocery shopping when your fridge is at its emptiest. This will help you identify items that might have expired and need tossing out.

When you are ready to begin, gather these essential items:

  1. Bicarbonate of soda
  2. Hot water
  3. Dry cloths or sponges
  4. A small bucket or bowl
  5. Protective gloves, if desired
  6. A cooler or a second fridge, if available, to store your perishables

The ratio for your homemade cleaning solution is straightforward: mix one part of baking soda with two parts of water. For tougher stains or for parts of the fridge that might need extra attention, creating a paste with a thicker consistency by using more baking soda will also do the trick.

Step-by-Step Instructions to Clean Your Fridge

  1. Emptying and Detaching Components Start by turning off your fridge to save energy and prevent any electrical mishaps. Then, remove all the food, shelves, drawers, and any removable parts. Place your food in a cooler or a secondary fridge to keep it fresh. This is also a good time to throw away any expired products or items you no longer want.
  2. Creating your Bicarbonate of Soda Cleaning Solution In a small bucket or bowl, mix approximately one part bicarbonate of soda with two parts warm water to create your natural cleaning solution. If certain areas require more attention, use a mix with a higher concentration of baking soda for a paste-like texture. For those particularly stubborn stains, a solution of one part baking soda to one part vinegar will help break them down. Mixture Ingredients Use Case Standard Cleaning Fluid 1 part baking soda, 2 parts water General fridge cleaning Paste for Tough Stains Higher concentration of baking soda with water Stubborn stains, dried spills Stain Remover Equal parts baking soda and vinegar Set-in stains and odors
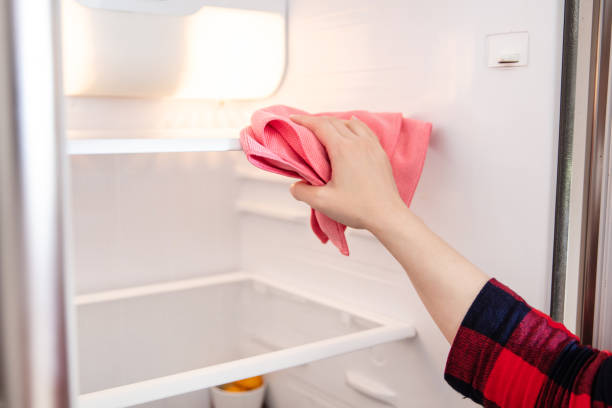
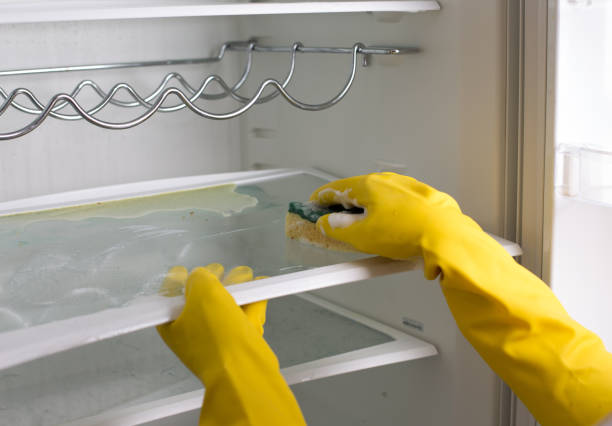
  3. The Cleaning Process Use a sponge or cloth dipped in the baking soda solution to wipe down the interior surfaces of the fridge, including the walls, base, and ceiling. Pay special attention to corners and crevices where crumbs and liquids might have hidden. For an even deeper clean, apply the paste to any stubborn spots and let it sit for several minutes before scrubbing it off. Ensure you’re also cleaning the removed components, such as shelves and bins, with the same solution. This will help maintain consistency in cleanliness and odor removal throughout the fridge. After you have scrubbed all areas of the fridge with the baking soda solution, it’s time to rinse. Using a clean cloth dipped in plain water, then rinse off the baking soda mixture from all surfaces. This step is crucial to avoid any residue being left behind that could also influence the taste of your stored food.

Wiping Dry

Post-rinsing, it is important to dry all surfaces and components thoroughly. Moist spots could lead to bacterial growth, so take your time drying with clean, dry cloths. This step helps keep your fridge free from mildew and ensures that no moisture is trapped when you put the food back in.

Wiping dry also means drying the removable parts separately before putting them back into place. The rubber seal on the door, often neglected, should be carefully dried and examined for any debris that might have collected – this area is a hot spot for grime and should not be overlooked.

Close-up of bicarbonate of soda paste used in deep cleaning a refrigerator.

Aftercare and Maintenance Tips

Maintaining the cleanliness of your fridge doesn’t end with wiping dry—it’s an ongoing commitment. To help make future cleanings easier and less frequent, there are several aftercare steps you can take:

  • Store food in airtight containers to minimize spills and odors.
  • Keep an open box of baking soda inside to continuously absorb odors.
  • Wipe up any spills immediately to prevent them from hardening and becoming more difficult to clean later on.
  • Double-check the temperature settings of your fridge, as proper temperatures can slow down bacterial growth and help keep food fresh longer.

Implementing preventative measures will also go a long way in keeping your fridge clean. For instance, placing a liner at the bottom of your crisper drawers will collect any debris and can be removed and cleaned separately. This is an efficient way to maintain cleanliness without needing to empty the entire fridge again. Additionally, scheduling regular cleaning sessions, perhaps once a season, will ensure your fridge never reverts back to a state requiring another deep clean.

By integrating these maintenance tips, not only will your fridge stay hygienic, but the food stored within it will also remain fresher for longer. This approach to refrigerator cleanliness helps keep your kitchen a health-friendly environment and could also save you time and effort in the long run.

Step-by-step guide showing fridge cleaning using bicarbonate of soda.

Conclusion

In conclusion, cleaning your fridge with bicarbonate of soda is a simple, safe, and highly effective method to ensure it remains a clean and pleasant environment for your food. By following the steps outlined in this guide—from gathering the necessary items to emptying the fridge, making a cleaning solution, and wiping it down to aftercare and maintenance—you can achieve a deeper clean that also supports healthy food storage practices. Regular use of baking soda for cleaning will also promote an odor-free, sparkling interior that makes your kitchen chores a bit more enjoyable. Remember, a clean fridge not only means a healthier home but also contributes to less food waste and improved efficiency of your appliance.

FAQs

Q1: How often should I clean my fridge with bicarbonate of soda?

A1: It’s a good practice to give your fridge a thorough clean with bicarbonate of soda roughly every three to four months. However, if you notice odors or spills, it’s wise to clean those areas immediately to avoid harder-to-clean messes and persistent smells.

Q2: Can I use bicarbonate of soda to clean the freezer as well?

A2: Absolutely, you can use a similar method to clean your freezer with bicarbonate of soda. Make sure you defrost the freezer first, and then apply the same cleaning solution but ensure you dry the surfaces thoroughly to prevent ice from forming on any remaining moisture.

Q3: What other areas of the kitchen can benefit from cleaning with bicarbonate of soda?

A3: Bicarbonate of soda is extremely versatile and can be used to clean sinks, tiled surfaces, and even stubborn grease from oven interiors or stovetops. It’s a natural cleaner that is also effective in removing tea and coffee stains from mugs.

Q4: Will cleaning my fridge with bicarbonate of soda affect the taste of my food?

A4: If you rinse and dry all surfaces properly after cleaning, there should be no residual taste of bicarbonate of soda on your food. It’s non-toxic and food-safe when used as a cleaner, provided it’s washed off thoroughly.

Q5: What if I have particularly tough stains, can I leave the baking soda paste on overnight in my fridge?

A5: For very stubborn stains, you can leave a thicker paste of baking soda and water on the affected area for a longer period, even overnight. Just make sure to rinse it well afterwards, and you might find it significantly easier to wipe the stain away.

Step-by-step image guide for cleaning washing machine soap dispenser effectively

How to clean a soap dispenser in a washing machine?

The health of your washing machine largely depends on how well you keep its various parts clean, especially the compartments that frequently interact with detergents and softeners. Over time, soap scum, detergent drawers’ remnants, and softener dispensers accumulate a sticky residue. This not only hampers the efficiency of your wash cycles but could also become a breeding ground for bacteria and mold.

Maintaining your detergent dispensers doesn’t have to be a tedious task. Identifying signs it’s time to clean your dispenser is essential. You might notice detergent not dispensing correctly, an unpleasant smell coming from the dispenser drawer, or visible soap residues and mold inside the drawer. When any of these signs occur, you’ll know it’s time to roll up your sleeves and give your dispenser a thorough cleaning.

Close-up picture of disassembled soap dispenser from a washing machine

Preparing for the Cleaning Process

Before diving into the cleaning frenzy, let’s talk safety first. Unplugging your washing machine from the power source is a crucial step. Not only does it prevent any potential electrical hazards, but it also ensures that your machine will not inadvertently start a cycle while you’re working on it.

Next, you will need to gather your cleaning materials. Here’s what you might need:

  1. Soft-bristle brush or sponge
  2. Old toothbrush for hard-to-reach places
  3. Mild detergent or all-purpose cleaner
  4. White vinegar or bleach for disinfection (optional)
  5. Clean, dry cloth or paper towels
  6. Bucket or basin for soaking parts

Step-by-Step Guide to Cleaning Your Soap Dispenser

The heart of our mission begins with removing the dispenser drawer from the machine. On most washing machines, this is accomplished by gently pressing down on a release lever and sliding the drawer out. If your machine does not feature a quick-release mechanism, you might need to consult the user’s manual for instructions specific to your model.

Once you have the detergent drawer removed, fill a basin with hot, soapy water. Allow the drawer to soak in the solution, which will help dissolve and loosen the soap scum and buildup. After soaking, use a soft-bristle brush or sponge to gently scrub the drawer, paying extra attention to the nooks and crannies where detergent can gather. An old toothbrush can be invaluable for reaching into tight spaces.

As for the cavity where the drawer resides, it’s typically damp and dark—perfect for mold and mildew to thrive. Running water through the dispensing area with the drawer removed will help rinse away loose debris. For more persistent build-up, a mild cleaning solution and an old toothbrush might also do the trick.

StepActionTools
Step 1Unplug machine
Step 2Remove drawerRelease lever
Step 3Soak in waterBasin, hottest water
Step 4Scrub the drawerSoft-bristle brush
Step 5Rinse cavityRunning water
Step 6Scrub cavityOld toothbrush

After dealing with lingering grime or buildup that water alone might not wash away, you can consider a mild all-purpose cleaner or a mixture of hot water and vinegar. Be mindful when using stronger agents like bleach; they are highly effective but will need to be thoroughly rinsed to prevent any unwanted residues.

Cleaning the nooks and crannies requires a bit of patience. It’s those hard-to-reach spots that often harbor the most buildup, so take your time and be thorough.employing a q-tip or a dedicated cleaning toothbrush can aid in accessing tight spaces that larger brushes might overlook.

Remember that the goal is not only to make the dispenser look clean but to ensure it functions properly. Soap that does not rinse out can clog the dispenser, which, in turn, affects the detergent release into the wash cycle.

The dispensing compartments are especially important to inspect. If you notice water not flowing smoothly during the rinsing cycles, it’s a sign that there could be a clog. Regularly cleaning the dispenser will help reduce the chance of this occurring, thus keeping your washing machine running as efficiently as possible.

cleaning a soap dispenser drawer from laundry machine

Reassembling and Maintaining Your Soap Dispenser

Reassembling your washing machine’s soap dispenser is just as crucial as the cleaning process itself. Make sure the dispenser drawer and the cavity are completely dry before putting the drawer back in place. This will prevent any immediate mold or mildew from developing. Slide the drawer back in until it clicks into place, indicating it is secure.

Once your soap dispenser has been reassembled, it’s time to focus on maintaining its cleanliness. To avoid the build-up of detergent residues, you might consider using liquid detergents which tend to leave less residue than powders. Additionally, after each wash cycle, leave the dispenser drawer slightly open to allow air flow, which will help in keeping the area dry and less susceptible to mold growth.

Here are some simple tips for regular maintenance that will help keep your dispenser in top shape:

  1. Wipe down the dispenser drawer with a damp cloth after bulk purchases of laundry detergent to prevent residue from forming.
  2. Periodically run an empty wash cycle with just a cup of white vinegar or a washing machine cleaner – choose the hottest cycle available. This will help clear out any unseen residue within the lines and prevent odors.

Advanced Tips for a Thorough Clean

Sometimes your washing machine might require a deeper clean, especially if it hasn’t been maintained regularly. If you’re looking for an eco-friendly alternative, consider using natural cleaning solutions such as vinegar and baking soda. These natural cleaners are less abrasive and provide a gentle, yet effective, approach to removing soap scum and limescale.

In certain situations, you may find that home remedies and elbow grease just won’t cut it. This could also indicate a larger issue at hand, and it might be time to seek professional help. A certified appliance technician can provide a thorough examination and cleaning of your machine, ensuring all components are functioning correctly.

Before and after comparison of a washing machine soap dispenser cleaning

Conclusion

Cleaning your soap dispenser regularly is a critical aspect of washing machine maintenance that should not be overlooked. By following the step-by-step guide provided, you can ensure that your dispenser drawers are free of soap residues and your wash cycles are as effective as possible. The hints and tips outlined will not only extend the life of your machine but will also contribute to a fresher, cleaner laundry experience. Incorporating regular check-ups and cleaning routines can stave off potential malfunctions and costly repairs, proving that a little preventive maintenance goes a long way in home appliance care.

Frequently Asked Questions

How often should I clean my washing machine soap dispenser?

Ideally, you should clean your dispenser every one to two months. This frequency can vary based on your washing habits and the hardness of your water. If you live in an area with hard water or use your washing machine extensively, consider cleaning it more frequently.

Can I use vinegar to clean the dispenser?

Yes, white vinegar is an excellent cleaning agent for soap dispensers. It helps to dissolve soap residue and can even kill mildew and bacteria. Just be sure to rinse the dispenser thoroughly afterward to prevent any lingering vinegar smell.

What should I do if the dispenser is not removable?

If the dispenser is not removable, you can clean it by using a spray bottle filled with a cleaning solution to spritz the inside of the dispenser. Then, scrub with a small brush and rinse by running a wash cycle with the hottest water setting.

Is it safe to use bleach on my soap dispenser?

While bleach can be effective in cleaning and disinfecting, its use should be minimal and handled with care. Always dilute bleach with water and ensure that the area is well-ventilated. Rinse the soap dispenser thoroughly afterwards to remove any residual bleach.

Can a dirty dispenser affect my washing machine’s performance?

Absolutely. A dirty dispenser can become clogged, leading to detergent not being dispensed properly during wash cycles. This can result in clothes not being cleaned adequately, and in severe cases, it may cause malfunction of the washing machine. Regular cleaning will help ensure optimal performance.