Search for:
Front yard landscaping ideas for small areas featuring colorful flower beds

Landscaping ideas for small area in front of house

When space is at a premium, every inch counts—especially in the smallest front yards. The challenge of landscaping designs in smaller areas is to create outdoor spaces that are both functional and beautiful without having a sprawling canvas to work on. This article delves into innovative landscaping ideas that will help transform the confined area in front of your house into an enchanting outdoor oasis. It’s not just about making a great first impression; it’s about utilizing clever design elements that make a small front space feel more inviting, interesting, and even bigger.

Creative landscaping ideas for a small front yard with stone pathways and greenery

Beginning With Basics: Planning Your Landscape Design

A well-planned design is the heart of effective yard landscaping. Before you get started, consider the natural aspects of your space, such as the amount of sunlight it receives, the type of soil present, and the typical climate. Setting objectives for your landscape not only creates a roadmap but ensures the final result fulfills your wants for aesthetic appeal, ease of lawn maintenance, and functionality for other features like seating areas or walkways. Below is a table outlining factors to consider when planning your landscaping project:

ConsiderationDetails
SunlightAmount and time of day your yard receives sun; influences plant selection and placement.
Soil TypeSoil pH, texture, and drainage capabilities; essential for plant health and water features.
ClimateLocal weather patterns; helps decide on plants and design elements that will thrive.
ObjectivesAesthetic, maintenance level, functionality; guides the overall landscaping approach.

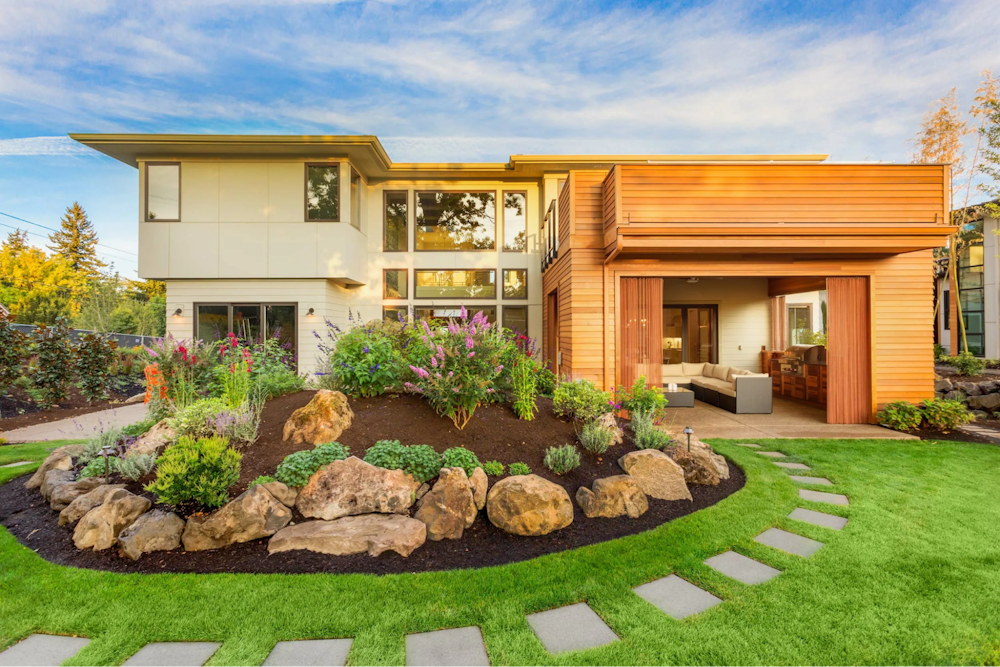
First Impressions Count: Creating a Welcoming Entryway

The entryway to your home should say ‘welcome’ with its symmetry, structure, and carefully chosen focal point. Whether it’s an elegant front door, a charming garden bed, or a unique sculpture, a well-defined focal point directs attention and can make the smallest front yard look more open and inviting. Incorporating a small fountain or rock garden adds color, texture, and sound, making your entrance even more appealing and also providing a tranquil greeting to guests.

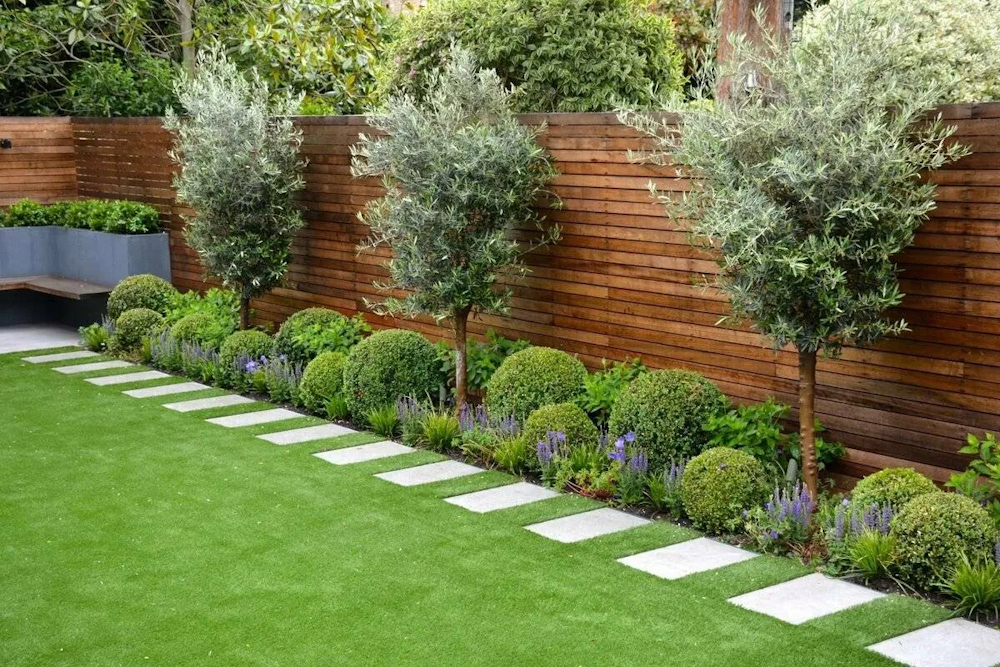
Plant Selection for Small Front Yards

In smaller spaces, every plant choice should be intentional. Opting for smaller trees, or even dwarf varieties, can provide greenery without overwhelming the space. When it comes to shrubs and perennials, selecting plants with different blooming times ensures your yard looks beautiful across seasons. Compact flower beds filled with beautiful flowers, like vibrant perennials, can edge walkways or frame your home’s entrance, providing curb appeal that lasts.

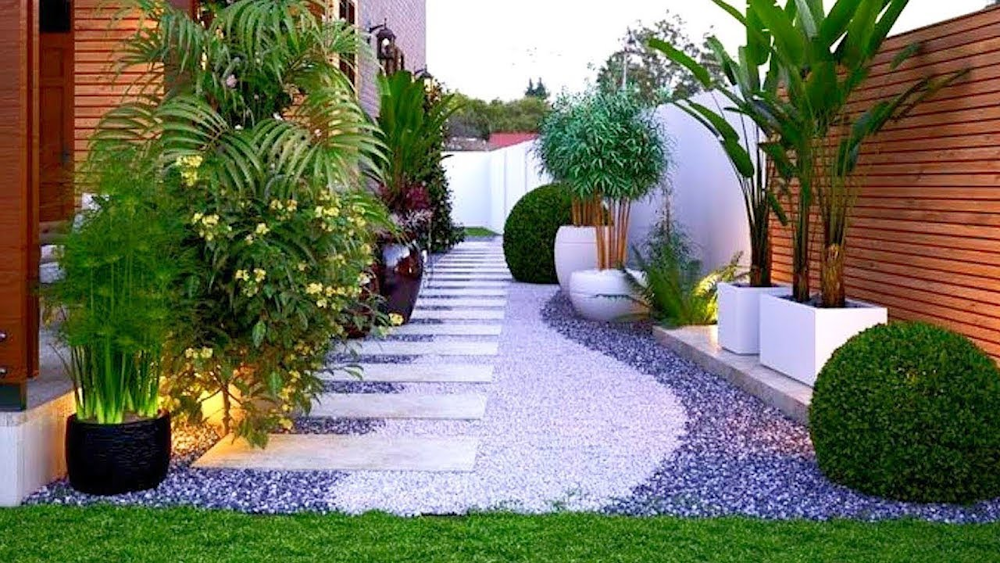
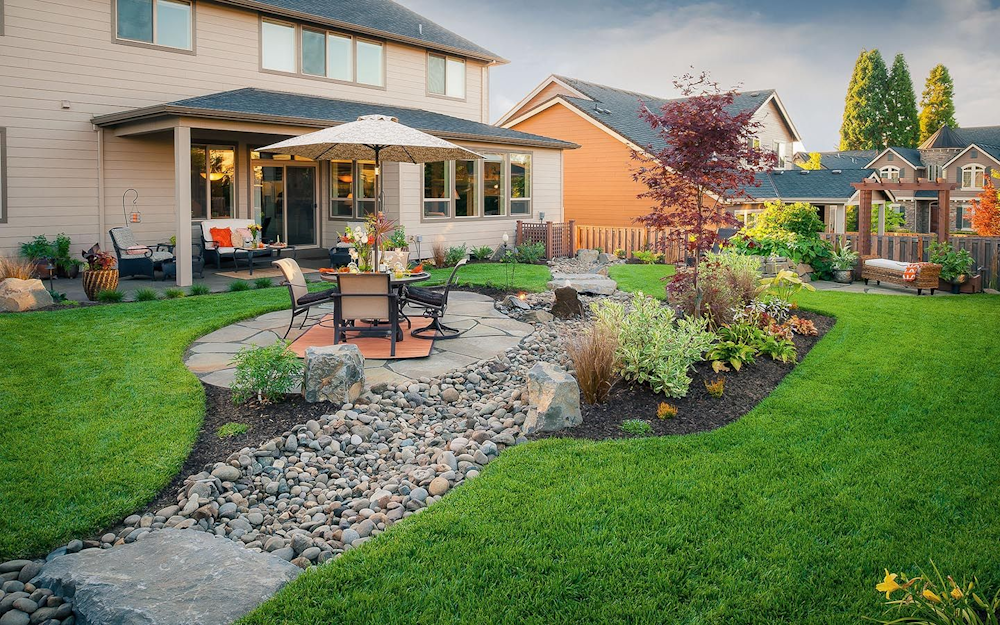
Incorporating Hardscapes Into Your Design

Hardscaping, with elements like stone walkways and natural rocks, can bring a new dimension to your front yard landscaping. It’s not just about plants; adding a stone pathway that curves through your yard can make the area feel larger while also helping to guide visitors naturally to your front door. Vertical elements such as trellises can add height and support climbing plants, maximizing your garden space upwards and adding interest.

Innovative small space front yard landscaping design with ornamental plants

Maximize Greenery in Limited Space

If you think you don’t have enough room for a variety of plants, think again. Utilizing containers and hanging baskets is an easy way to incorporate more natural beauty while keeping things simple. Here are some great choices for container gardening:

  1. Herbs and small vegetables for a practical and quaint kitchen garden
  2. Evergreen shrubs for year-round greenery
  3. Colorful annuals for bursts of color in any season

Low Maintenance and Sustainable Landscaping Ideas

For those looking to keep lawn maintenance to a minimum, focusing on sustainability with drought-resistant plants and greenery that requires little watering is a wonderful approach. Ground cover plants like thyme or sedum can reduce the need for weeding and are an excellent alternative to grass in drier climates. These low-maintenance options can help create a more natural looking space that’s easier to care for.

Incorporate Lighting for Nighttime Appeal

Landscape lighting is a powerful way to accent your landscaping designs, creating an enchanting atmosphere during the evening hours. When night falls, well-placed lighting fixtures, such as pathway lights or spotlights, can illuminate your front yard features, turning your home into a nighttime showcase. Consider energy-efficient LED lights for a long-lasting and cost-effective lighting solution.

Accessorize Your Landscape: Adding Personality to Your Small Space

Accessories in landscaping are like the jewelry of your outdoor spaces. They’re a reflection of style and personality. To add a personal touch to your front yard, you could also incorporate features such as birdbaths, sculptural art, or colorful flower pots. Garden accessories provide interest and a chance to express your creativity within the landscaping design.

Charming front yard landscaping ideas for small areas with decorative shrubs and lighting

Conclusion

With the right landscaping ideas, even the smallest front yard can be transformed into a charming and functional space. Clever use of planning, plant selection, and design elements not only makes the space more beautiful and inviting but can also offer a serene retreat just steps from your front door. It’s about getting creative within your limited space and finding ways to express your personal style, while also ensuring every square foot of your yard serves a purpose and adds to the overall aesthetic.

FAQs

Q1: How do you make a small front yard look bigger?

A1: Employ design strategies such as using the diagonal axis for pathways, light colors, and finer-textured plants at the far end of the yard to create depth. Defining clear functional areas and uncluttered open spaces also lends to an increased sense of space.

Q2: What is the best low maintenance plant for a small front yard?

A2: Dwarf shrubs, ornamental grasses, and succulents are top choices for low maintenance greenery. These plants generally require less pruning and can thrive with minimal fuss or water.

Q3: Can you have a lawn in a small front yard?

A3: Absolutely! A small, well-maintained lawn area can be a lush feature in a small yard. Alternative ground covers can also serve as a low-maintenance, visually appealing option.

Q4: How can lighting transform a small front yard at night?

A4: Proper outdoor lighting can add dramatic flair to a small front yard, highlighting key features, improving safety, and extending the usability of your yard into the evening. It transforms the ambiance and can make your home look warm and inviting.

Q5: What are some water-saving techniques for landscaping a small front yard?

A5: Opt for drought-tolerant plants, use a drip irrigation system targeted to plant roots, apply mulch to retain soil moisture, and consider rain barrels to collect and reuse rainwater for your garden.

Step-by-step guide for repairing cracks in sink using epoxy putty

How to fix cracks in sink

Cracks in your bathroom or kitchen sinks aren’t just eyesores; they can become gateways to more significant damage if neglected. Porcelain, ceramic, granite, or composite – no matter the material, fixing a damaged sink is a task that can often be handled without the need to call in a professional. This guide will cover the steps to efficiently repair smaller cracks and chips, ensuring your sink looks as good as new and functions without issues. With the right materials and a bit of patience, you’ll easily repair your cracked sink and prevent future leaks and structural damage.

Identifying the Type of Crack in Your Sink

Before getting started, it’s crucial to understand what type of crack you’re dealing with. Hairline cracks in a sink, often found in porcelain, could be superficial and not only easy to fix but also unlikely to cause larger problems. On the other hand, larger cracks or those that have led to leaks might need more than a simple DIY approach. Inspect your sink thoroughly, making sure that what seems to be small doesn’t run deeper or isn’t actually part of a bigger underlying issue that may require professional help.

Close-up of hairline crack in ceramic sink, a common household repair

Gathering the Necessary Tools and Materials

The next step is ensuring you have all the necessary tools and materials for the repair at hand. You will need a cleaning agent to prepare the damaged area, an appropriate filler – epoxy, porcelain filler, or another suitable compound – and tools like sandpaper for finishing touches. Safety equipment, such as gloves and eyewear, should also be on your list. Some repair kits come complete with everything needed, which could save you time and ensure you have the right materials for the material of your sink.

Preparing Your Sink for Repair

The key to a successful repair job is to start with a clean work area. Begin by thoroughly cleaning the sink, focusing on the crack and its surroundings. The sink will need to dry completely, so make sure to schedule your repair when the sink can be out of service for a bit. Then, protect the rest of the sink and nearby surfaces with tape or a cloth to avoid any accidental damage during the fixing process.

Step-by-Step Instructions to Fix Minor Cracks

  1. Cleaning the Damaged Area: Remove any debris or dirt from the crack using a clean cloth. Avoid using harsh chemicals that might damage porcelain or composite sinks. Dry the area completely.
  2. Applying the Filler: Mix the filler according to the manufacturer’s instructions. Using a small tool, apply the filler into the crack, making sure it fills the gap completely. Remove any excess before it dries.
  3. Smoothing and Blending: Once the filler starts to harden, smooth the surface using sandpaper. This step will help the repaired area blend with the rest of the sink.
  4. Curing and Drying Time: Check the recommended curing and drying times on the repair material’s instructions. Most fillers will require at least 24 hours to cure completely.
Sink restoration: applying sealant to fix and prevent further cracks

Addressing Larger Cracks and Chips

When it comes to larger cracks that might have caused leaking, it’s often best to consider using more durable materials or consulting with a professional. However, if you’re set on attempting a repair, the process is generally similar to fixing smaller cracks. You might need to reinforce the area with mesh before applying an epoxy adhesive or a more substantial filling compound to ensure the repair is secure.

Finishing Touches and Preventive Measures

After the filler has cured, your repair job is almost done. The final steps involve sanding down the repaired area to create a smooth surface and then applying a sealant to ensure water resistance and longevity. To prevent future cracks, avoid pouring very hot or very cold water directly into the sink, which creates temperature stress. Also, prevent dropping heavy objects, which could lead to chips and deeper damage.

What Not to Do: Common Mistakes in Sink Repair

To ensure the best results in your repairing process, remember to avoid common mistakes such as rushing through the drying times or using materials not suited for your sink type. Additionally, don’t ignore the manufacturer’s instructions for the repair kits – these guides are there to help you achieve the most durable repair. Lastly, don’t neglect safety precautions; simple gloves and goggles can prevent unnecessary accidents.

DIY sink repair: tools and materials needed to fix cracks in porcelain sink

Conclusion

In conclusion, repairing cracks in your bathroom or kitchen sink can be a straightforward task if done correctly. By thoroughly cleaning the area, choosing and applying the right filler, and taking the time to sand and seal the repaired area, your sink can look and function as good as new. Remember, the key is to address cracks early to prevent them from causing larger issues down the line. Following the steps outlined in this guide will ensure you can manage minor repairs yourself, saving you the cost and hassle of replacing your sink.

StepActionTools/Materials Needed
1Clean the damaged areaClean cloth, mild cleaning agent
2Apply the fillerEpoxy/porcelain filler, applicator tool
3Smooth the surfaceSandpaper
4Allow curing timeNone

FAQs

1. Can all sink materials be repaired with the same methods and materials? No, different sink materials such as porcelain, ceramic, and stainless steel require specific repair methods and materials. Always check the compatibility of the repair kit with your sink’s material.

2. How long do I need to wait before using the sink after a repair? It varies depending on the filler material used, but it’s typically recommended to wait at least 24 hours for the material to fully cure and harden before using the sink.

3. Is it possible to repair a sink crack without any visible signs of the repair? With proper technique and color-matched filler, a repair can be made nearly invisible, but some faint signs of repair may still be present, depending on the extent of the damage.

4. What should I do if the crack in my sink continues to spread after repair? If a crack spreads after a repair, it may indicate an underlying issue with the sink or its installation. It’s best to consult a professional plumber or contractor to assess and address the problem.

5. Are DIY repair kits safe for all types of sinks, including kitchen and bathroom? Yes, there are DIY repair kits designed to be safe for both kitchen and bathroom sinks. However, ensure to choose a kit that’s appropriate for the sink’s specific use and material.